
I have been in a bit of a culinary creative slump for a little while this winter. It happens from time to time, especially when I get tired of seeing the same ingredients on the store shelves. Bring on Summer and fresh veggies of all kinds, shapes, and sizes! Bring on roadside stands where the produce still has dirt on them! Bring on the smell of smokers and barbecues and bonfires!
Therefore, in light of me not having a really good new recipe to share with you, I have compiled a little list of things that I find helpful around the RV, or any kitchen. Feel free to comment or message me with some of your favorites.
1. Knife skills are important, as are a few good knives. A chef’s knife, a filet knife, and a paring knife. You can pretty much do whatever you need to with those. Add a bread knife if you make your own bread, or if you prefer them for cutting tomatoes. If you need to brush up on your knife skills, may I recommend watching videos from Jacques Pepin. It isn’t hard to learn good knife skills, it just takes practice like anything else.
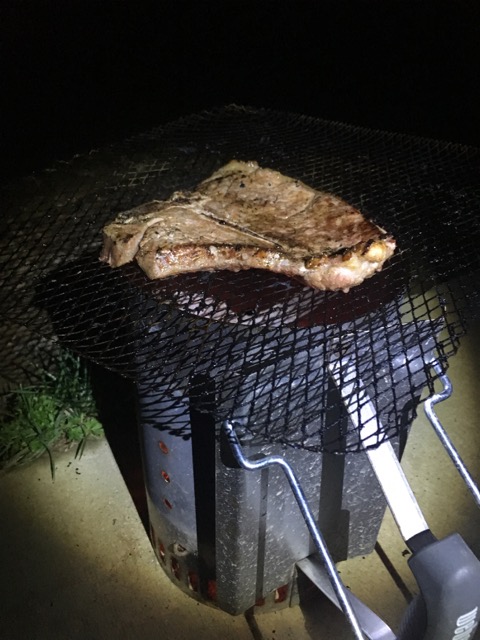
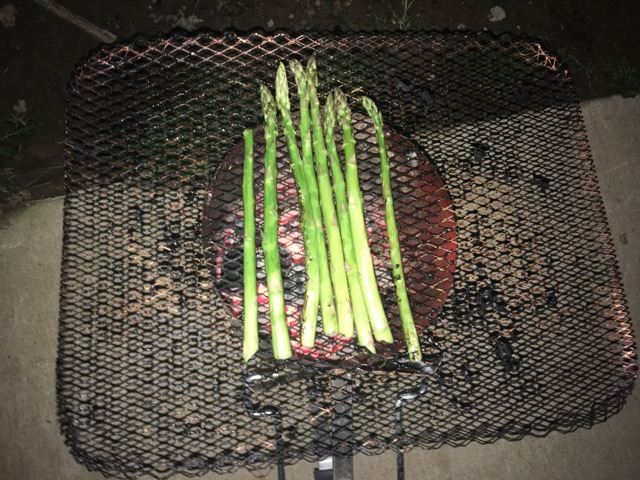
2. You use a chimney to get your coals started for your grill, right? Check this out: If you are cooking for one or two people, you can use a grill grate on top of your chimney instead of using your grill. Yup. Just throw that t-bone, asparagus, or whatever else right on top of the chimney. It will be fast and hot cooking with almost no clean up. You can also toss a cast iron pan on top and sizzle away!
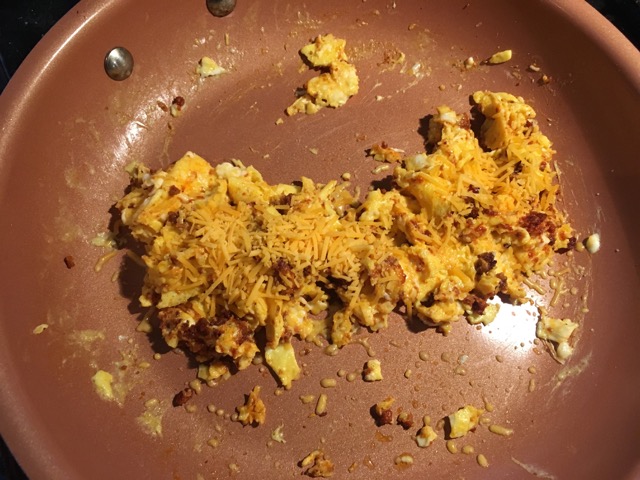
3. I just retired my non-stick pan that I had procured from my girlfriend’s meager collection when we first got together ten years ago. I had heard the hype, and seen the infomercials, about the ceramic pans. Two weeks ago I went and spent $25 on the Gotham Steel pan at the mega store. WOW! Yes, you really can just put cheese in this thing and burn it and it will slide right out. It cooks bacon, chorizo, eggs, and cheese without hesitation. Heck, I once cooked a half pound of bacon in it, then just rinsed it out with hot water before continuing to cook other items in it. It does heat up rather quickly, and very evenly, so take it easy the first time you use it. Cleaning is a snap. Hot water, some soap on a scrubby, and then rinse. Done. I am very impressed.
I wonder if they make ones in smaller sauté sizes…
4. I don’t have a conventional oven in my RV. I have one of those convection/microwave combos. I like it well enough, even though it takes forever if it is cold outside as the rear of the unit butts up against the exterior wall of the kitchen. One of my major peeves though is that it does not broil. OK, it really doesn’t even brown very well. I mean, making biscuits in it with a cast iron pan works out “OK,” but you can’t get good color on anything.
Cast iron to the rescue! (Yes, again. Can you tell I’m a fan?) All you need to do is fire up that cast iron about 5 minutes or so before your food is due to come out of the oven and then toss it in the cast iron for a little color and texture. This is called a “reverse sear.” Case in point: My girlfriend has a guilty pleasure. She likes the Totino’s Party Pizzas. I don’t know why. She was born in the Midwest, so maybe she just doesn’t have any idea of what good pizza is supposed to taste like. Anyways, it cooks OK in the oven, but won’t get browned on the bottom, even when I use a rack that I made to fit inside and keep the food off the bottom so air can flow around it. So, after the pizza is cooked, I take it out and drop it into my Wagner 9 for about two minutes. It browns the bottom perfectly, and it doesn’t seem as much like a frozen rectangle that was heated up to barely edible.
Of course, you could do the reverse of the reverse as well. Thinking of making a meatloaf, or a roast, or even baking chicken? Sear it in the pan first. This will help lock in some of the flavor and the juices. When you do that, you can use olive oil or butter, as well as things like garlic, fresh rosemary, thyme, or other herbs. Baste the meat as you sear it for a couple minutes per side. Then toss it in the oven to finish.
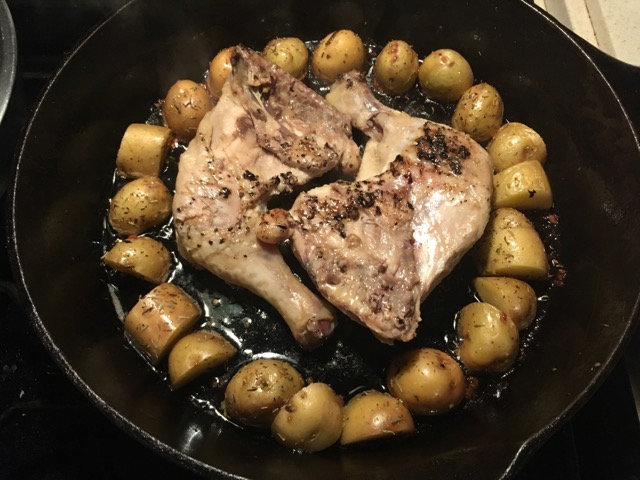
5. We all hate washing dishes. Seriously, one of the reasons I love working in commercial kitchens is that I have my own dishwasher on staff. I know that some of you might have dishwashers in the RV, but the reality is that most of us don’t. So, when you want to make a meal but don’t wan’t to deal with al the mess of multiple pans, just use one. Yup. There is absolutely nothing wrong with either cooking some of the ingredients ahead of time and then adding them all together at the end, or just cooking them all in the same pan in succession. For instance, it is really easy to make a dinner comprised of potatoes, a meat, and some veggies all in the same pan. Start with the potatoes (because they will take longer to cook). Then move them aside and put in your protein of choice. When the meat is about halfway done and after you flip it, add the veggies. Use the same butter and spices on everything, or not. It is up to you. Have fun and experiment!
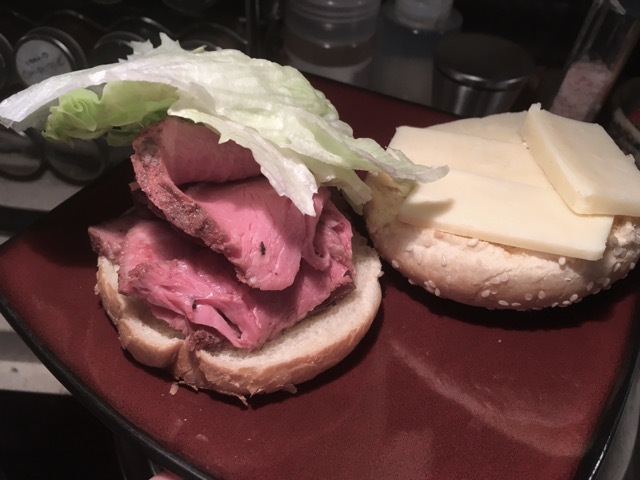
6. Making your own cold cuts is ALWAYS cheaper than buying them at the store. Some of you are big sandwich people, some aren’t. However, you can’t deny that sometimes a big ‘ol Dagwood is just heavenly. Either that, or it is a travel day and you want to have something that is relatively quick to put together at the rest area. Prices for meats are continuing to rise. When it comes to deli meats (or sandwich meats, or cold cuts, depending upon where you were raised), those prices are getting ridiculous. $12 a pound for roast beef? $10 a pound for ham? HAM! Oh, and don’t even think of buying the prepackaged, processed, salt and preservative laden stuff. Yuck.
Here’s what I do: I get a small roast, or ham, or a single turkey breast, or whatever. It usually costs about half per pound compared to the deli. Take a little time one day to prepare it the way you like. Marinate it. Smoke it. Bake it. Grill it. Whatever. Then place it in the fridge. You can make room. It won’t be there for long. The next day take it out and slice it however you like it. (You can cheat on this by tossing it in the freezer for a few hours and then slicing it instead of taking up space in the fridge.) Depending on how many people you have in the RV and how much you like sandwiches, grab some and put it in a sandwich bag for use over the next few days. Take the rest and wrap them in 1/2 pound amounts and freeze them for later. You could always share with your fellow campers instead, and they just might return the favor one night when they cooked up too many ribs.
7. Pasta hacks: Add the pasta to your cold water and heat it all up together. Most pastas will take 11 minutes using this method. Some heartier ones might take a few minutes more.
Reserve about a half cup of the water before draining the pasta. Add it to your sauce. Why? It contains the starches from the pasta and will not only thicken the sauce a bit but it will help it stick to the pasta.
Don’t rinse your pasta for the same reason as you should save some of the water.
8. I love tomatoes. Especially the little ones. Grape tomatoes, cherry tomatoes, sunrise, and my favorite ones are the Constellation tomatoes. I always try to have a small container on hand to snack from or to add to dishes. It can really make a difference. For example, that potatoes protein veggie one pan dish we were talking about earlier? When you serve it, toss four to six small tomatoes onto the plate next to the veggies. They will provide a cool temperature to contrast the heat of everything else, as well as provide a completely different texture, which is just as key as flavor.
9. With spring here and summer on the way, lots of us will be making hard boiled eggs for may things. My favorite is Deviled Eggs. It is also a nice snack to have on hand in the fridge. I usually boil mine a dozen at a time, more if I am going be sharing.
Everyone has their own trick to making it easier to peel hard boiled eggs, and I think I have tried them all. What I have found that works best is to let them crack when you place them in the ice bath directly after cooking. You use an ice bath, right? It keeps them from getting overdone and makes them easier to peel. By letting the shells crack just a bit it lets some of that ice water get underneath the shell. This works to start separating the membrane that is between the shell and the egg. When it is time to shell them, look at the egg. There is a pointy end, and a round end. Usually there will be an air gap between the egg membrane and the shell at the round end. Tap that on the counter to crack it and start peeling from there in a line down one side of the egg. Once you break that membrane it will release its hold on the egg. After making your seam you should be able to peel the rest of the shell off fairly easily.
That’s it for now. Let me know about any hacks that you have learned that you can’t live without, and Happy Spring!!
To read past RVEpicure articles click here.


